Coupa overview
Information on the Coupa system, navigation, and interface

Supplier Portal Overview
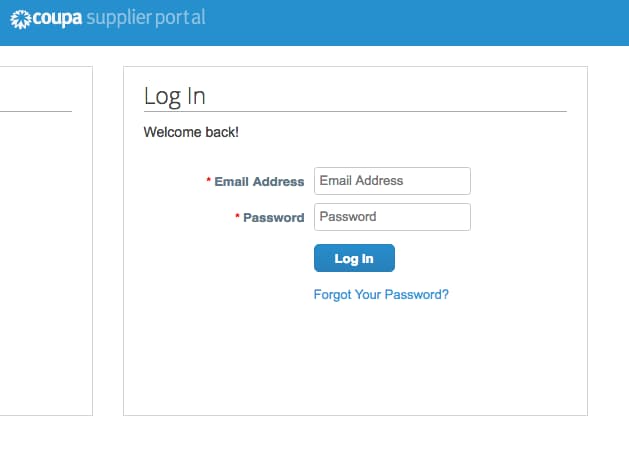
Enter the Email Address and Password that was created when you first registered. Click Log In to access the Coupa Supplier Portal.
*If you forgot your password, click on “Forgot Your Password?” and Coupa will send an autogenerated email to you. If you did not receive the email, check your Spam/Junk Folder.
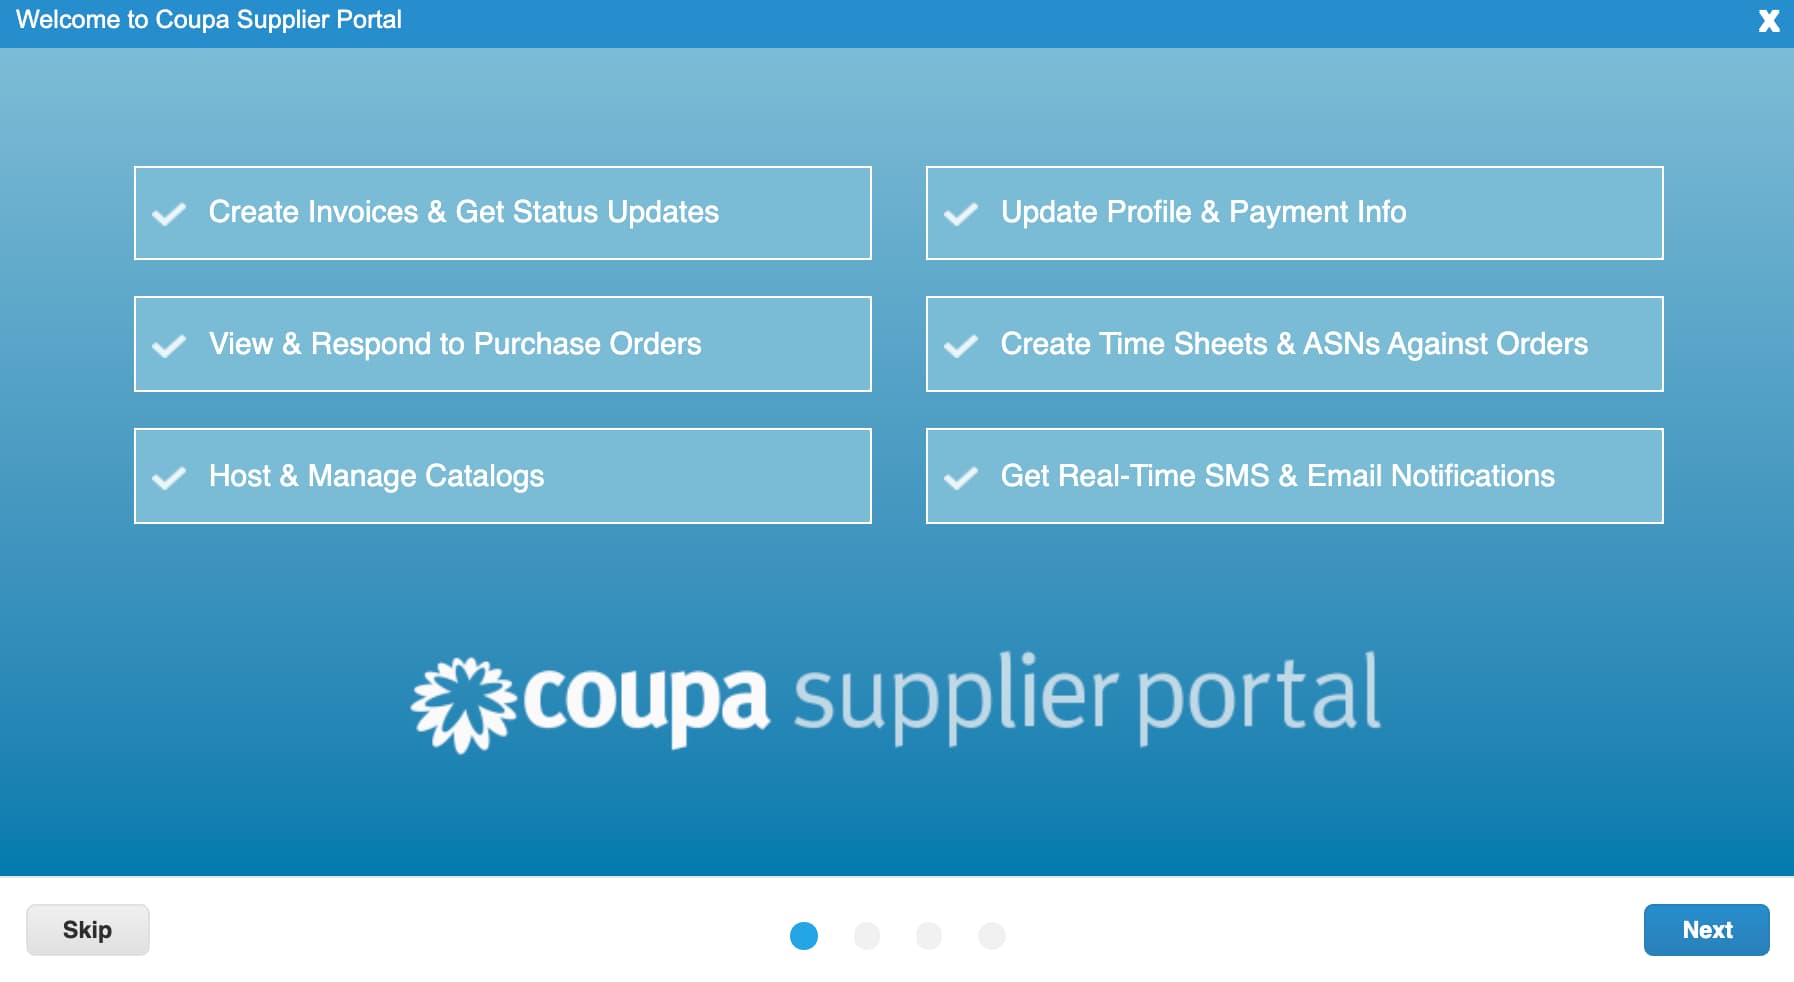
Coupa Supplier Portal Tour
Coupa has created a welcome tour for all new users. It is recommended to take the tour once.
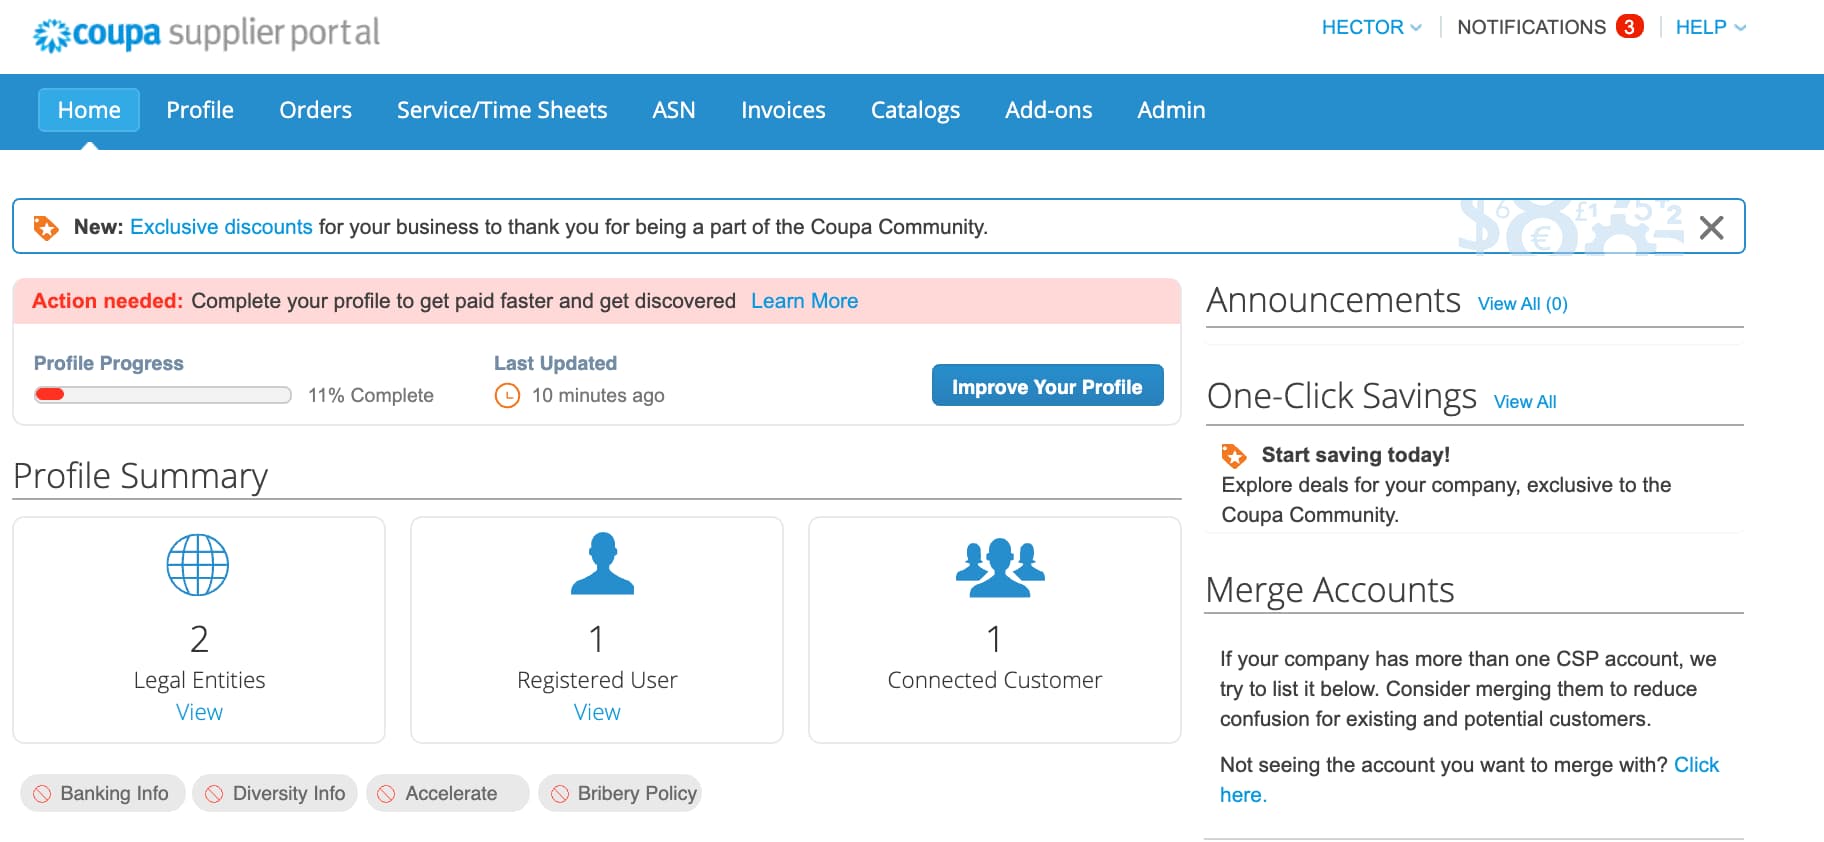
This is your Coupa homepage
The main tabs you will be using for Spotify are: Profile, Orders, Invoices, and Admin
Additional features would be Account Settings, Notifications, Invite Users, and Merge Accounts. Account settings can be access by going to the top right corner and hovering or clicking on your name.
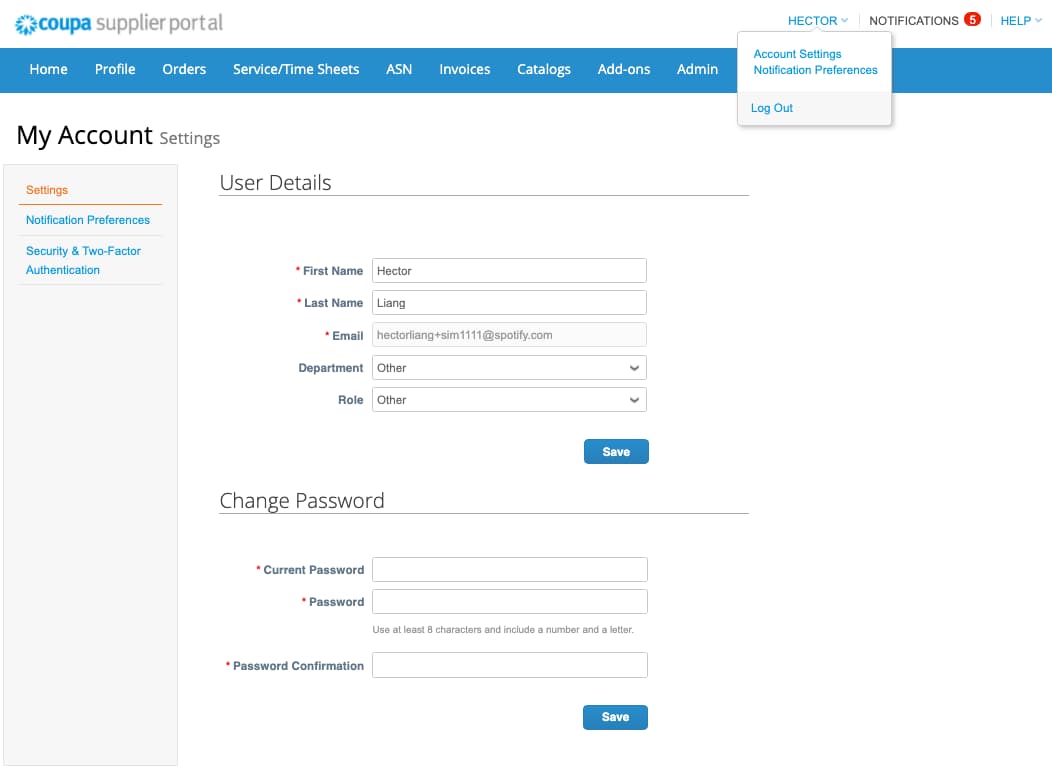
Account Settings
The Account Setting page allows you to change your First and Last Name, your department, your role, and your password.
Here you can also Enable or Disable Two-Factor Authentication.

Notifications and Notification settings
Notifications is similar to an Email inbox. You can set your notification preferences by clicking the “Notification Preferences” on the top right corner. Once you adjust, scroll to the bottom and click Save.
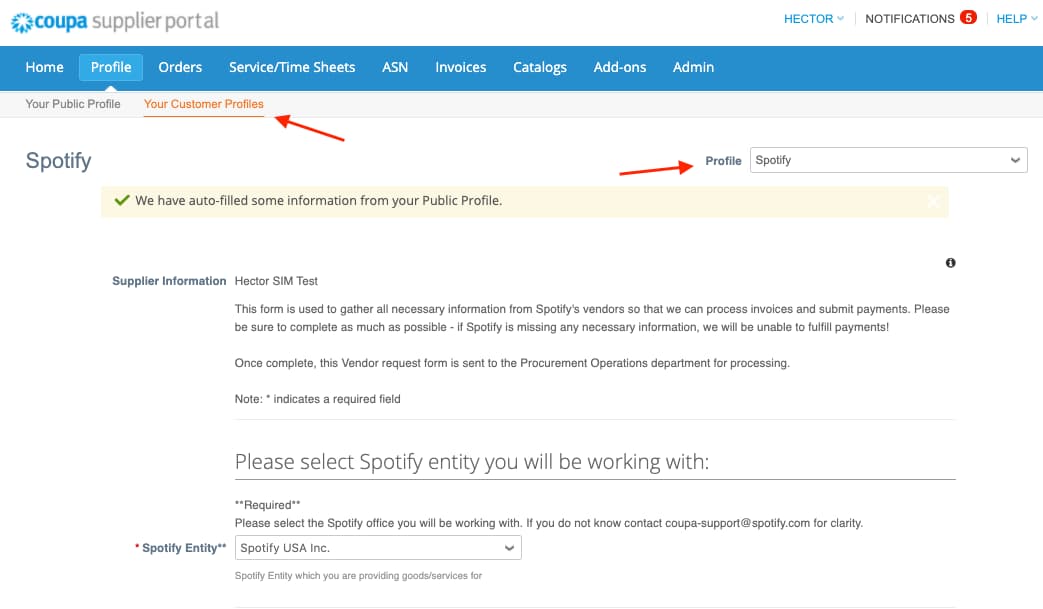
Profile
The Public Profile will not update or send information to Spotify.
If you need to update your company’s information for Spotify, please click the Spotify profile by going to “Your Customer Profiles” and choosing Spotify in the dropdown.
Clicking on the profile will route you to the questionnaire where you can update and submit your information to Spotify.
*Note* You must click “Submit for Approval” on the questionnaire for changes to take into affect.
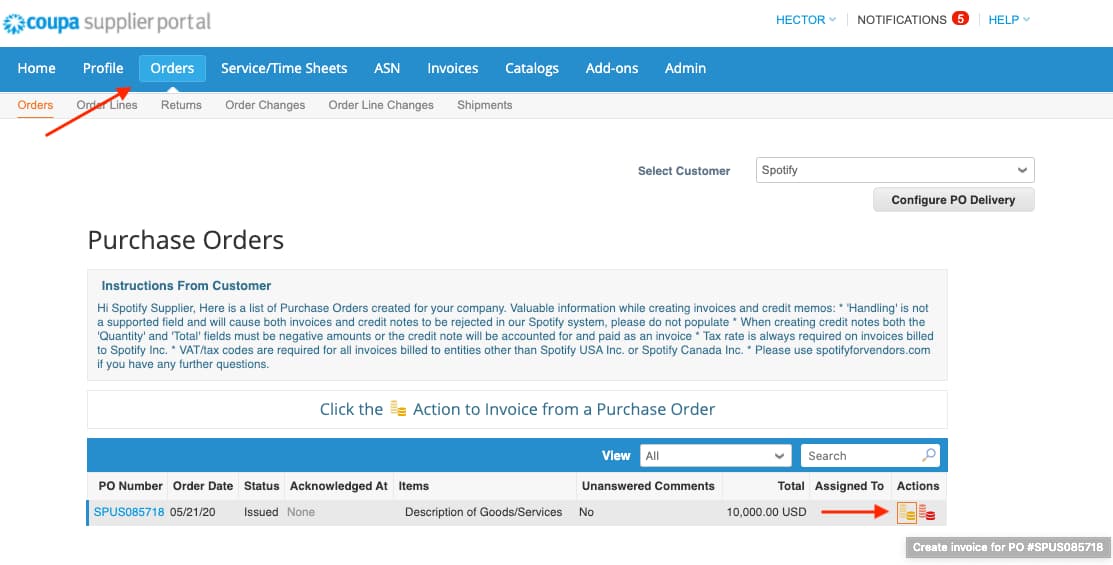
Orders (Purchase Orders)
This is where Spotify’s purchase orders (PO) are located.
You can select your customer to view different purchase orders.
You will be able to create an invoice from this page by clicking on the gold stack of coins or clicking into the PO number.
*If you do not see any purchase orders, please reach out to your Spotify Contact.
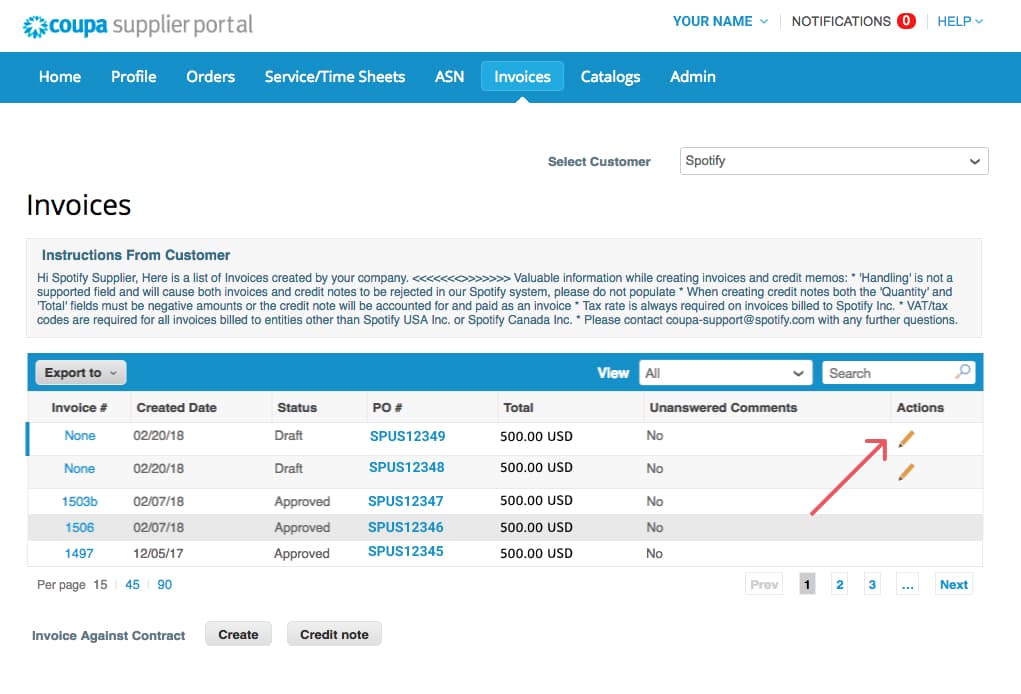
Invoices
This is your invoices page, from here you will be able to see the status of your submitted invoices. You can use the view function to sort by status or “Create View” to create your own view.
*You will not be able to edit an invoice once it is submitted.
Admin
The Admin tab is where you will be add Users, Merge your other Coupa accounts, View your Remit-To information, and complete your E-invoicing Setup.
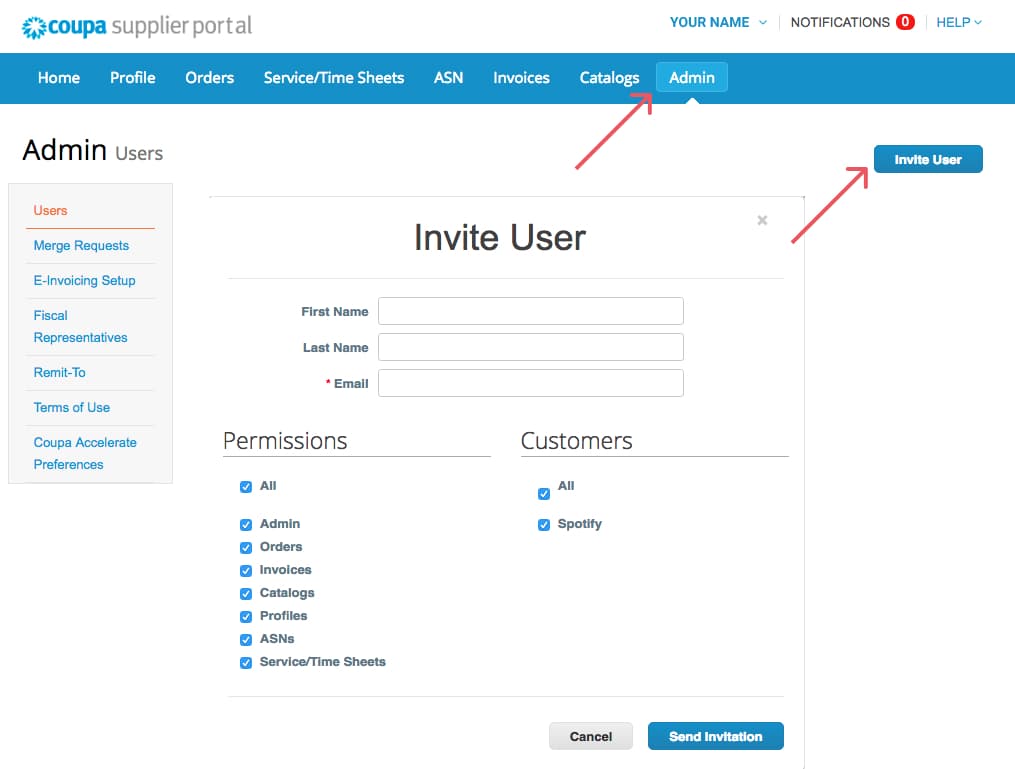
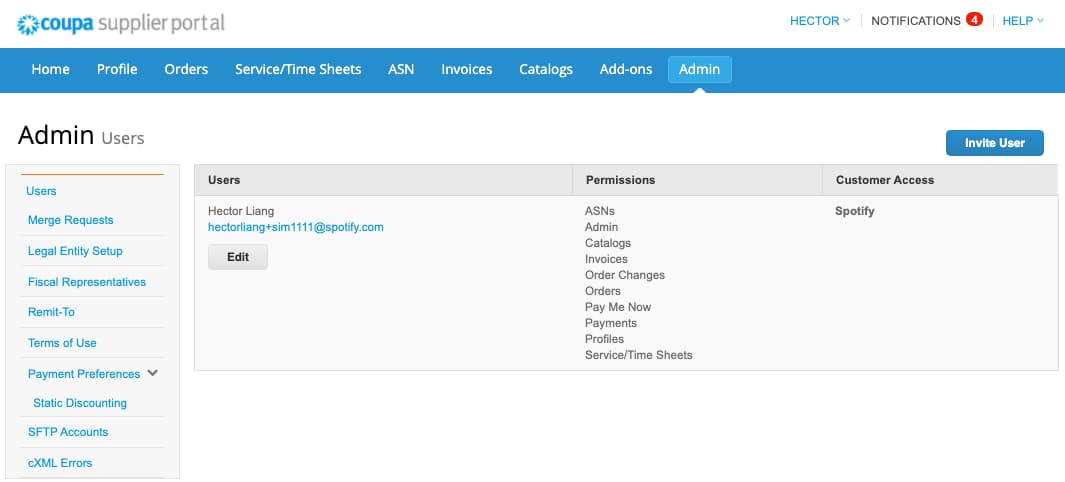
Users
To invite Users, click “Invite User”, enter the user’s information, and select the permissions and customers you wish to give them access to. Click Send Invitation and the User will receive an Email from Coupa prompting them to accept and create a password.
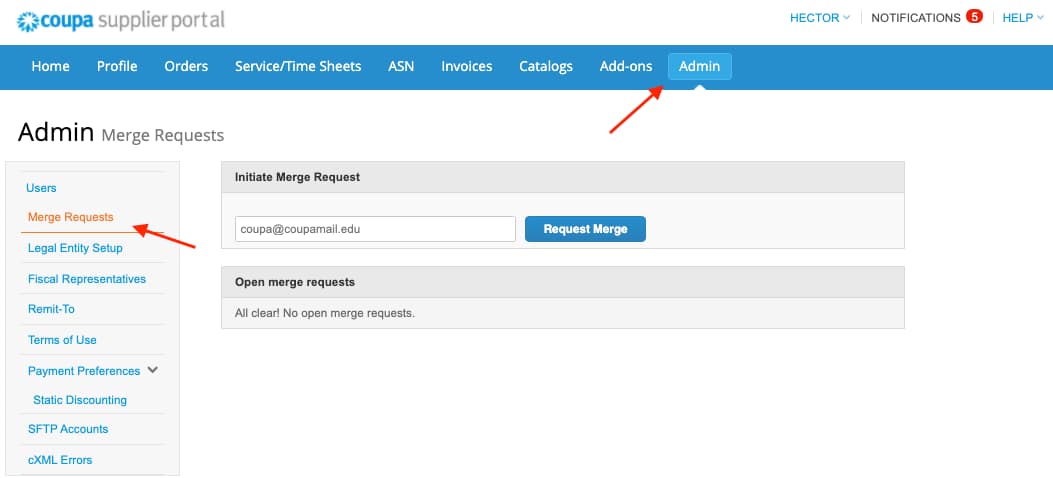
Merge Request
On this page, you will be able to view any merge request you may have and accept/decline them. You will also be able to send out Merge request using this page as well. Merge requests is used if you have more than one Coupa profile.
Enter in the Email address of the other account and click “Request Merge”. They will receive a notification to accept or decline.
*This can also be found on the homepage. If a recommended supplier appears on the homepage and you click Request Merge, this page will appear.
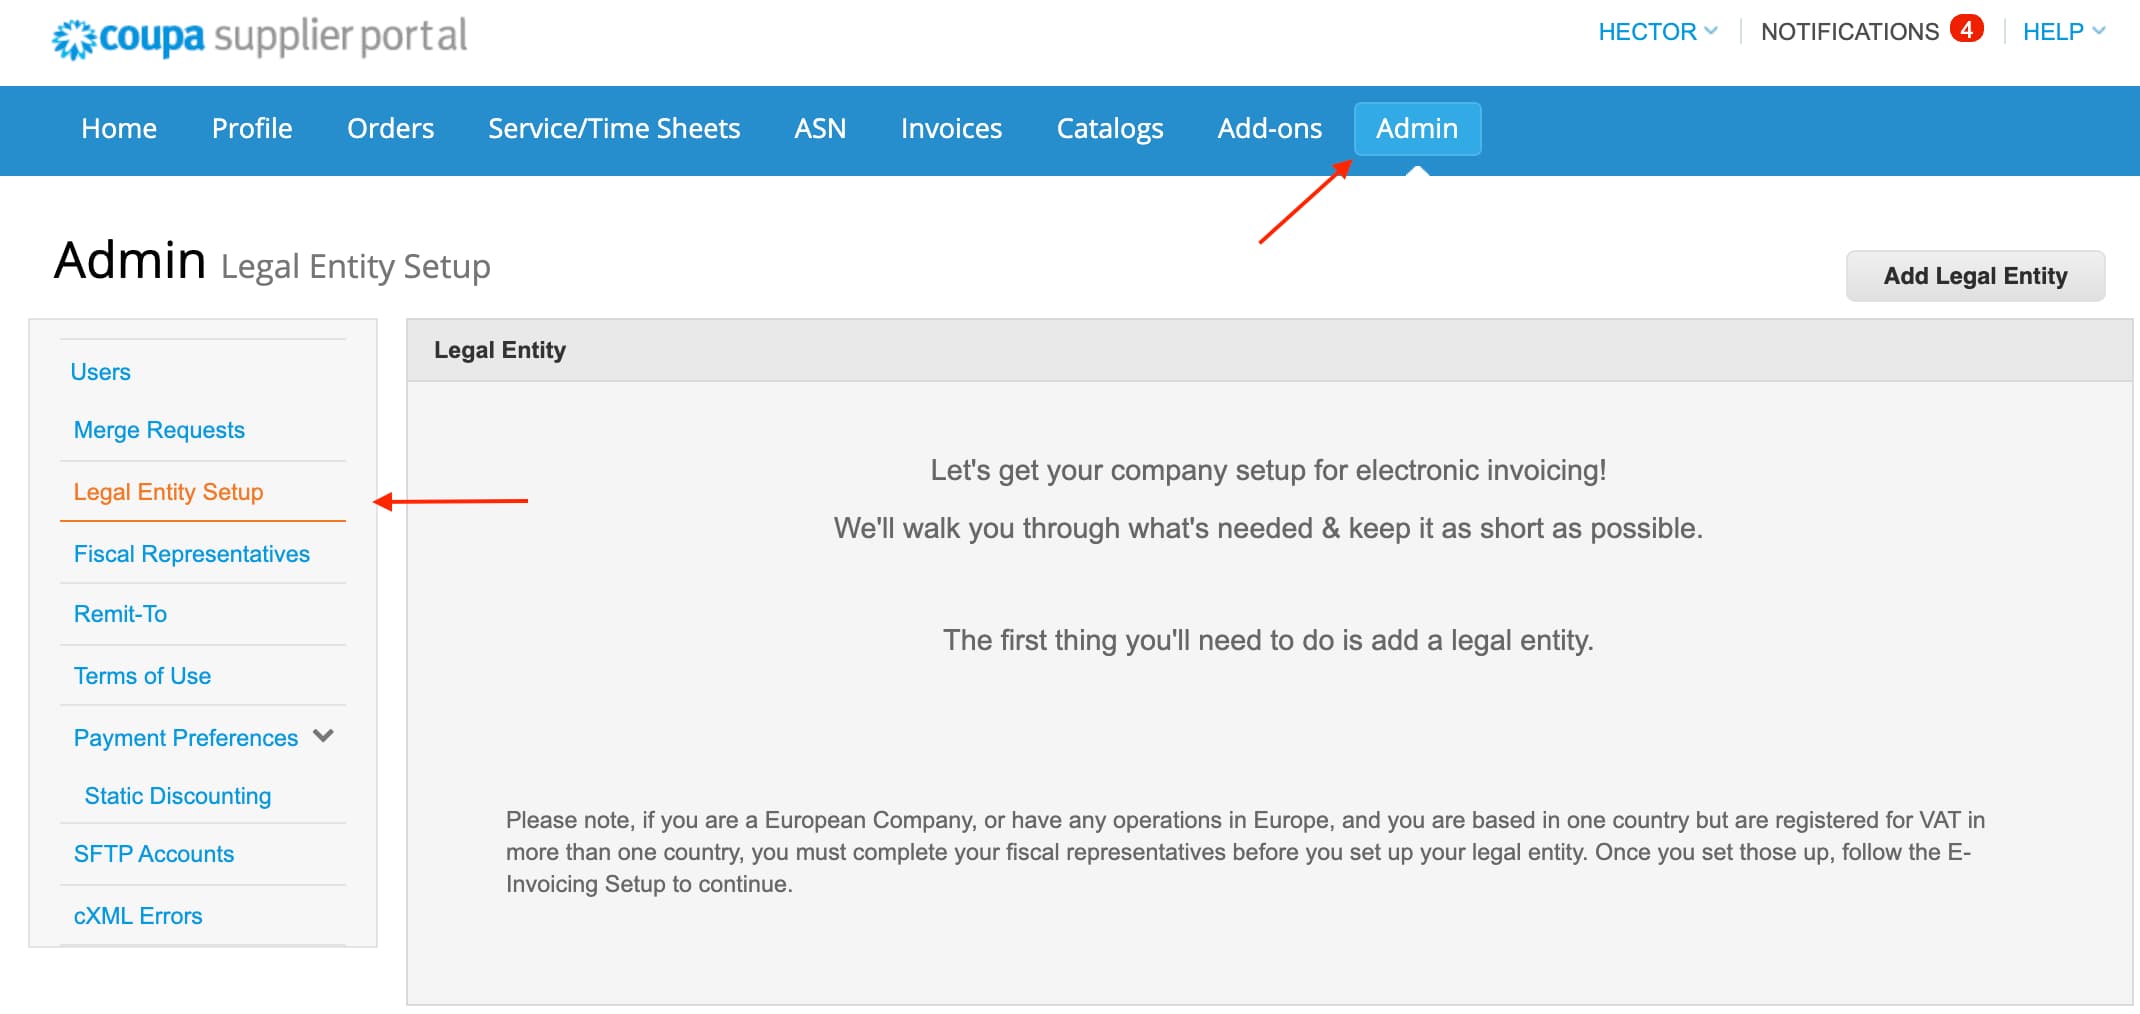
Legal Entity Setup
Here you will be able to view all the Legal Entities you created. You will be able to deactivate the entities by clicking “Action” or adding new Legal Entities by clicking “Add Legal Entity”.