Non-Compliant Invoicing
Invoicing for Non-U.S.A. Based Suppliers

General Invoice Requirements
Unsure of what Spotify requires to be on our invoices?
Please refer to the following link for invoice requirements per Spotify entity.
Invoice Requirements by Spotify Entity
All invoices must include the required information listed in the above sheet. Some countries have additional requirements.
If the invoice does not contain all required information it will be rejected by the Accounts Payable team and returned to the supplier.
Via email
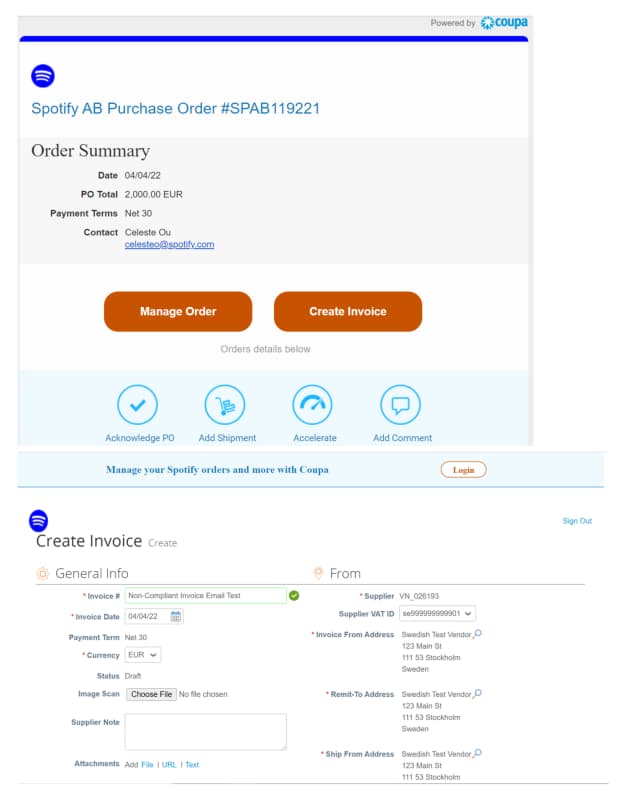
To begin creating an invoice, click on the blue Create Invoice button.
Note: Acknowledge PO simply notifies the Spotify contact that you have come in contact/received the Purchase Order
Note: You will be asked to register for E-invoicing and create a Remit-To and a Legal Entity if you have not already.
Via Log In
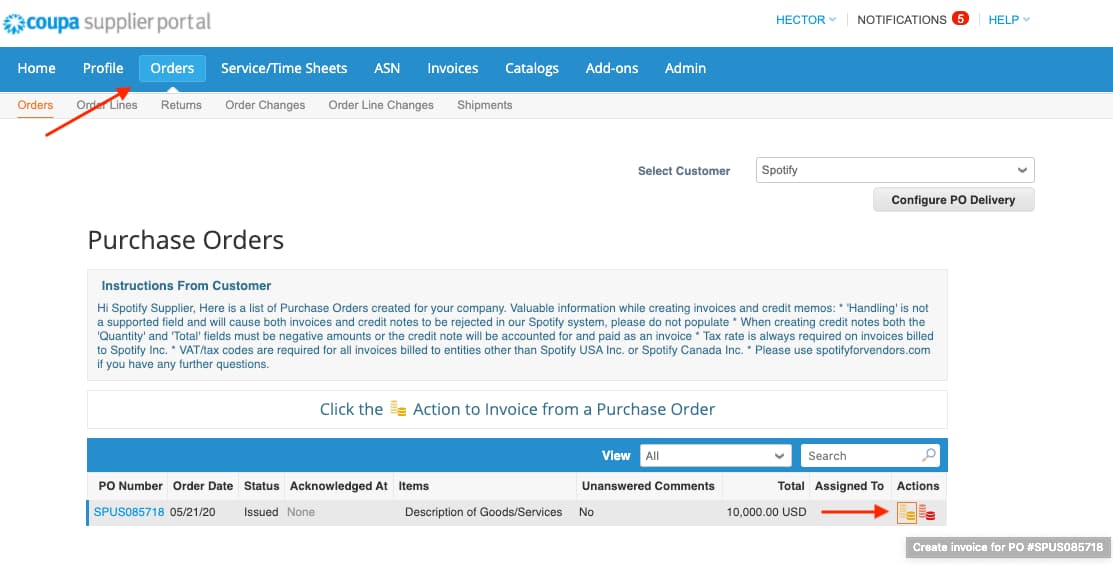
Go to the Coupa Supplier Portal (CSP) and Login
Click on the Orders tab to view Purchase Orders (PO)
Find the PO you need to invoice against and click on the stack of gold coins to the right OR click into the PO.
The Create Invoice page will appear
Choose Invoicing Details
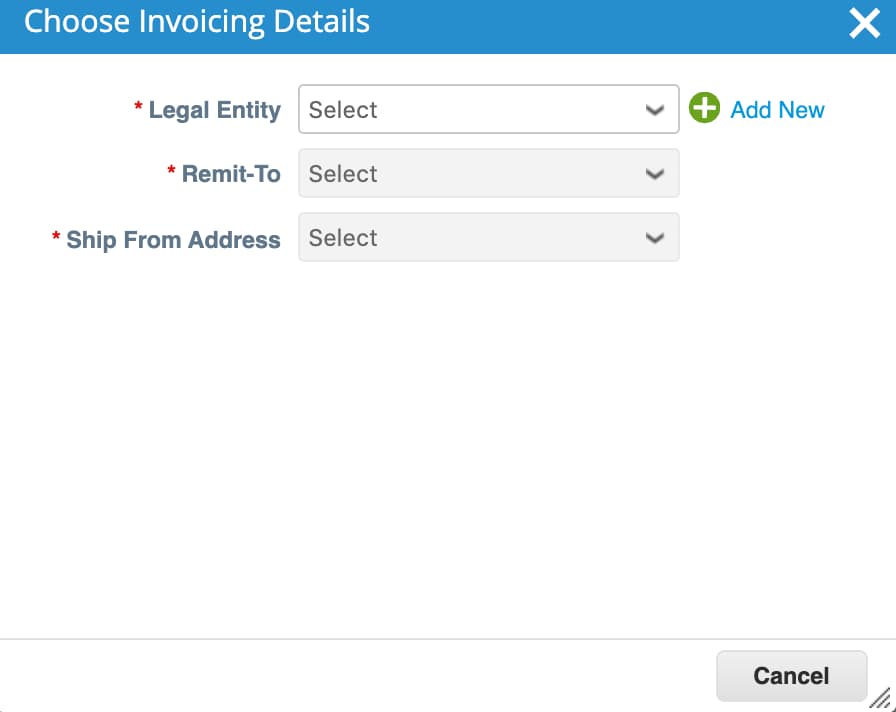
The Choose Invoicing Details will appear if you have not created a Legal Entity.
Legal Entity Name Select your Legal Entity name in the drop-down
Remit-To *IMPORTANT: For vendors with multiple ‘Remit To’: Please be sure to select your Remit To before entering invoice details. Failure to do so will result in Submission failure and your invoice entry form will be reset to blank.
If you have more than one Legal Entity name, please be sure to select the bank account listed in “Remit-To” that aligns with the bank account you intend to receive funds
Don’t see the bank account listed/have a new bank account you intend to receive funds to? You MUST UPDATE your profile and have it approved by Spotify Vendor Master Team before submitting your invoice. Click here to see how to update your profile
Once the legal entity is created, you can select the Remit-To and Ship From Address from the dropdown and click Save.
General Information and Form Fields
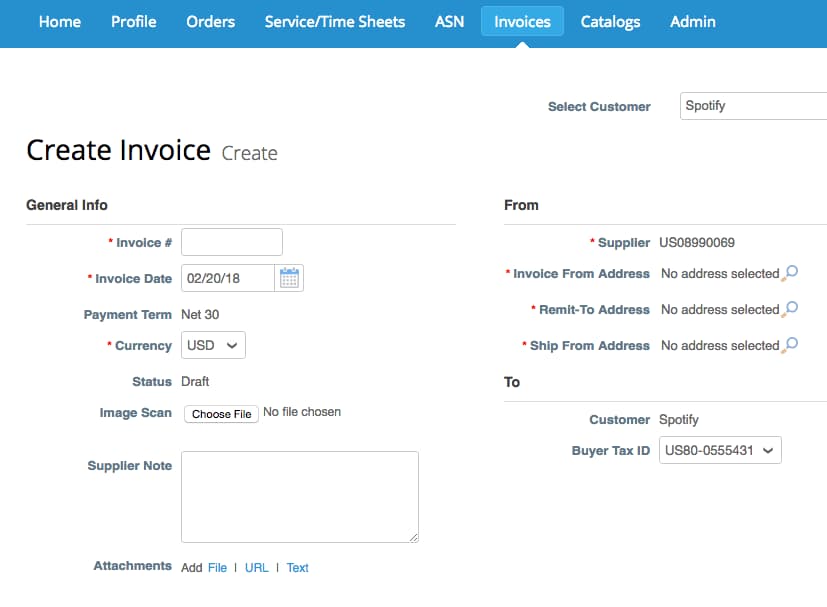
All fields marked with the * are required
“Invoice #” Each vendor must generate their own unique invoice number for invoice submission into Coupa.
“Invoice Date” defaults to “today’s” date. Change the “Invoice Date” when necessary to match the date that the milestone for the payment was completed, goods were shipped, or services delivered.
“Currency” needs to align to the currency of the PO that has been created. If the currency listed does not match your agreement, reach out to coupa-support@spotify.com
“Image Scan” is the field for PDF Invoice. The Invoice number in Coupa must match the invoice number in your PDF attachment.
“Attachments” feature should only be used for additional support for the invoice and not used to upload any generated invoice from Coupa or supplier generated invoice.
Valid attachments include: Report of Cost Allocation, Work Order Progress, Certified Payment Application, Signed Cover Letter -where applicable
Edit Purchase Order Lines
If you need to delete a purchase order line or you are invoicing against a purchase order with multiple lines, please click on the red X next to the line you are not using (next by the line total amount).
Note: If you are not invoicing for the entire purchase order, you must delete the unused lines.
Example: A purchase order was created for the entire year by months and you are invoicing only for January, you will have to delete the other 11 lines to submit the invoice correctly.
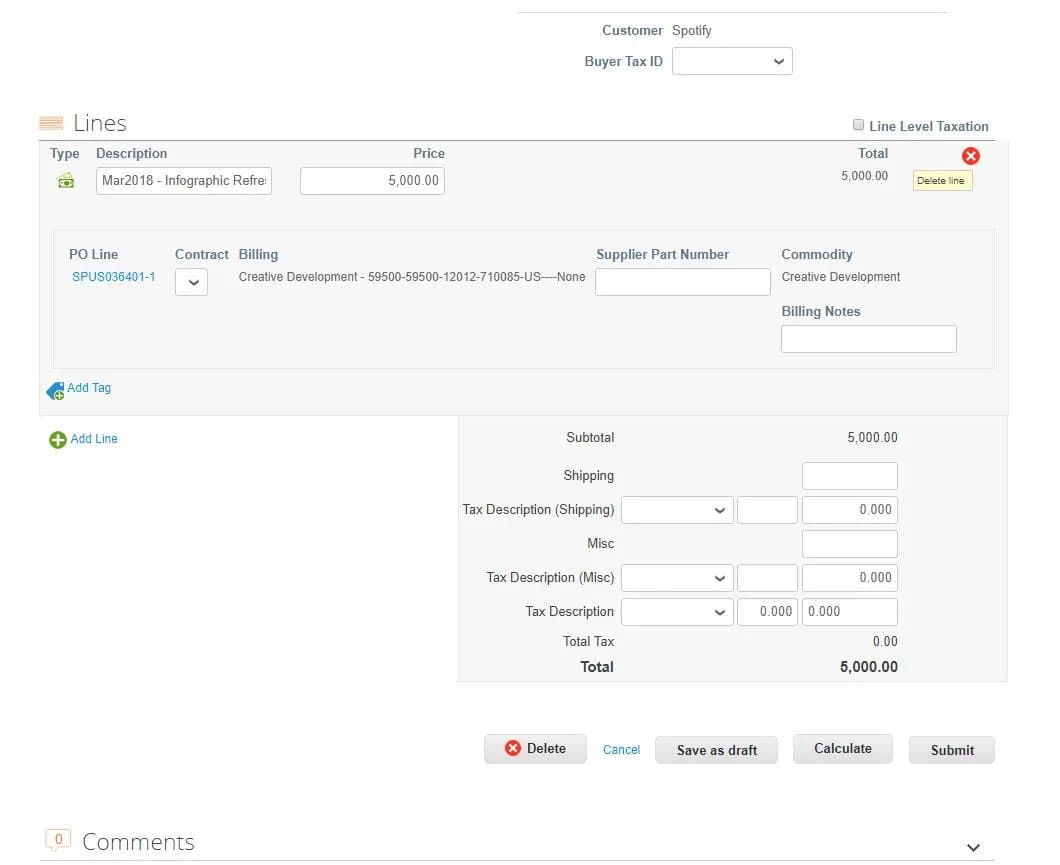
Input a Tax Description (TAX/VAT CODE)
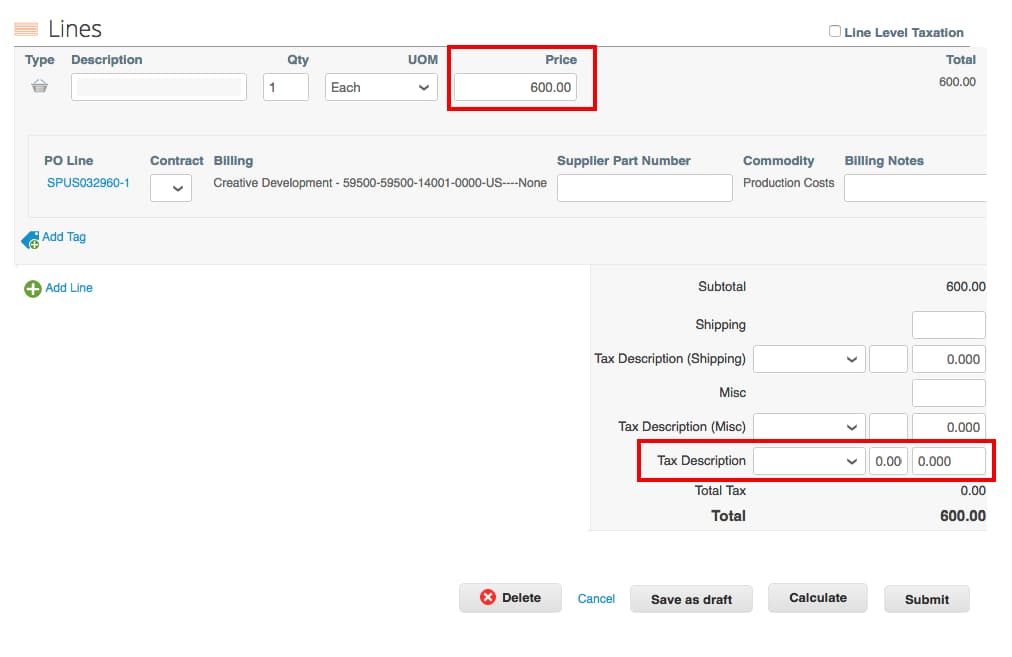
Next you will adjust the PRICE to reflect the desired billing amount.
Note:
Enter the Tax Amount under the “Tax” field at the bottom. Click Calculate to calculate the total price including tax Click SUBMIT once complete.
Line Level Taxation
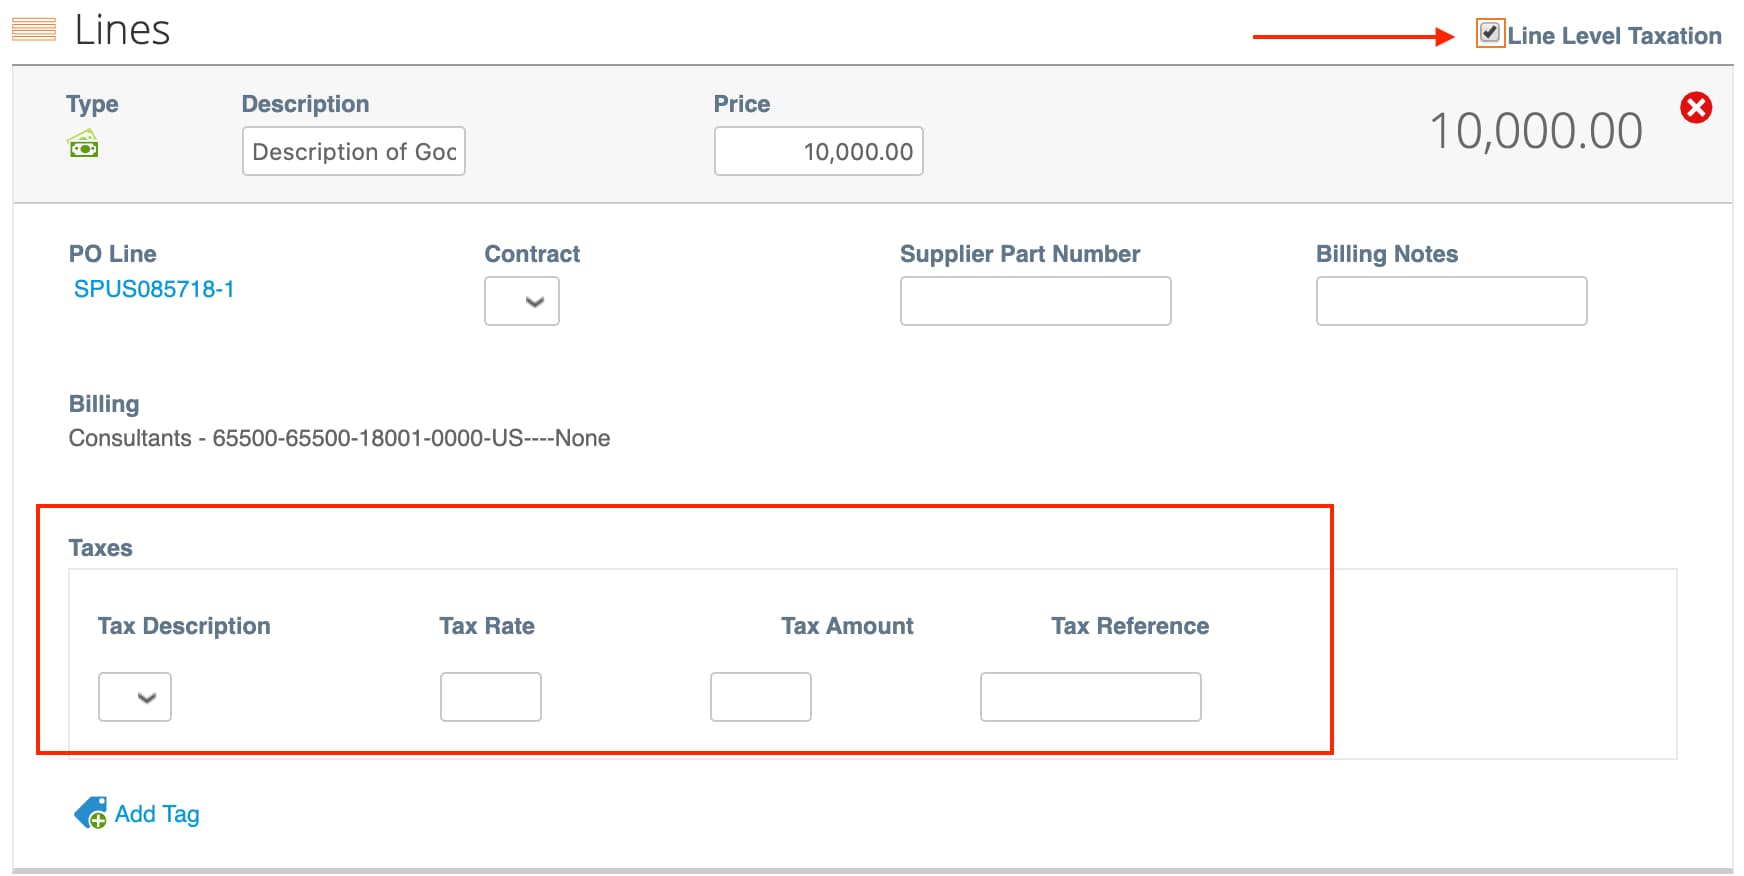
If there is line level taxation, you can input the tax per purchase order line by checking the “Line Level Taxation” checkbox. A tax box will appear on the individual purchase order line where you will enter the Tax Rate.
Creating a Credit Note
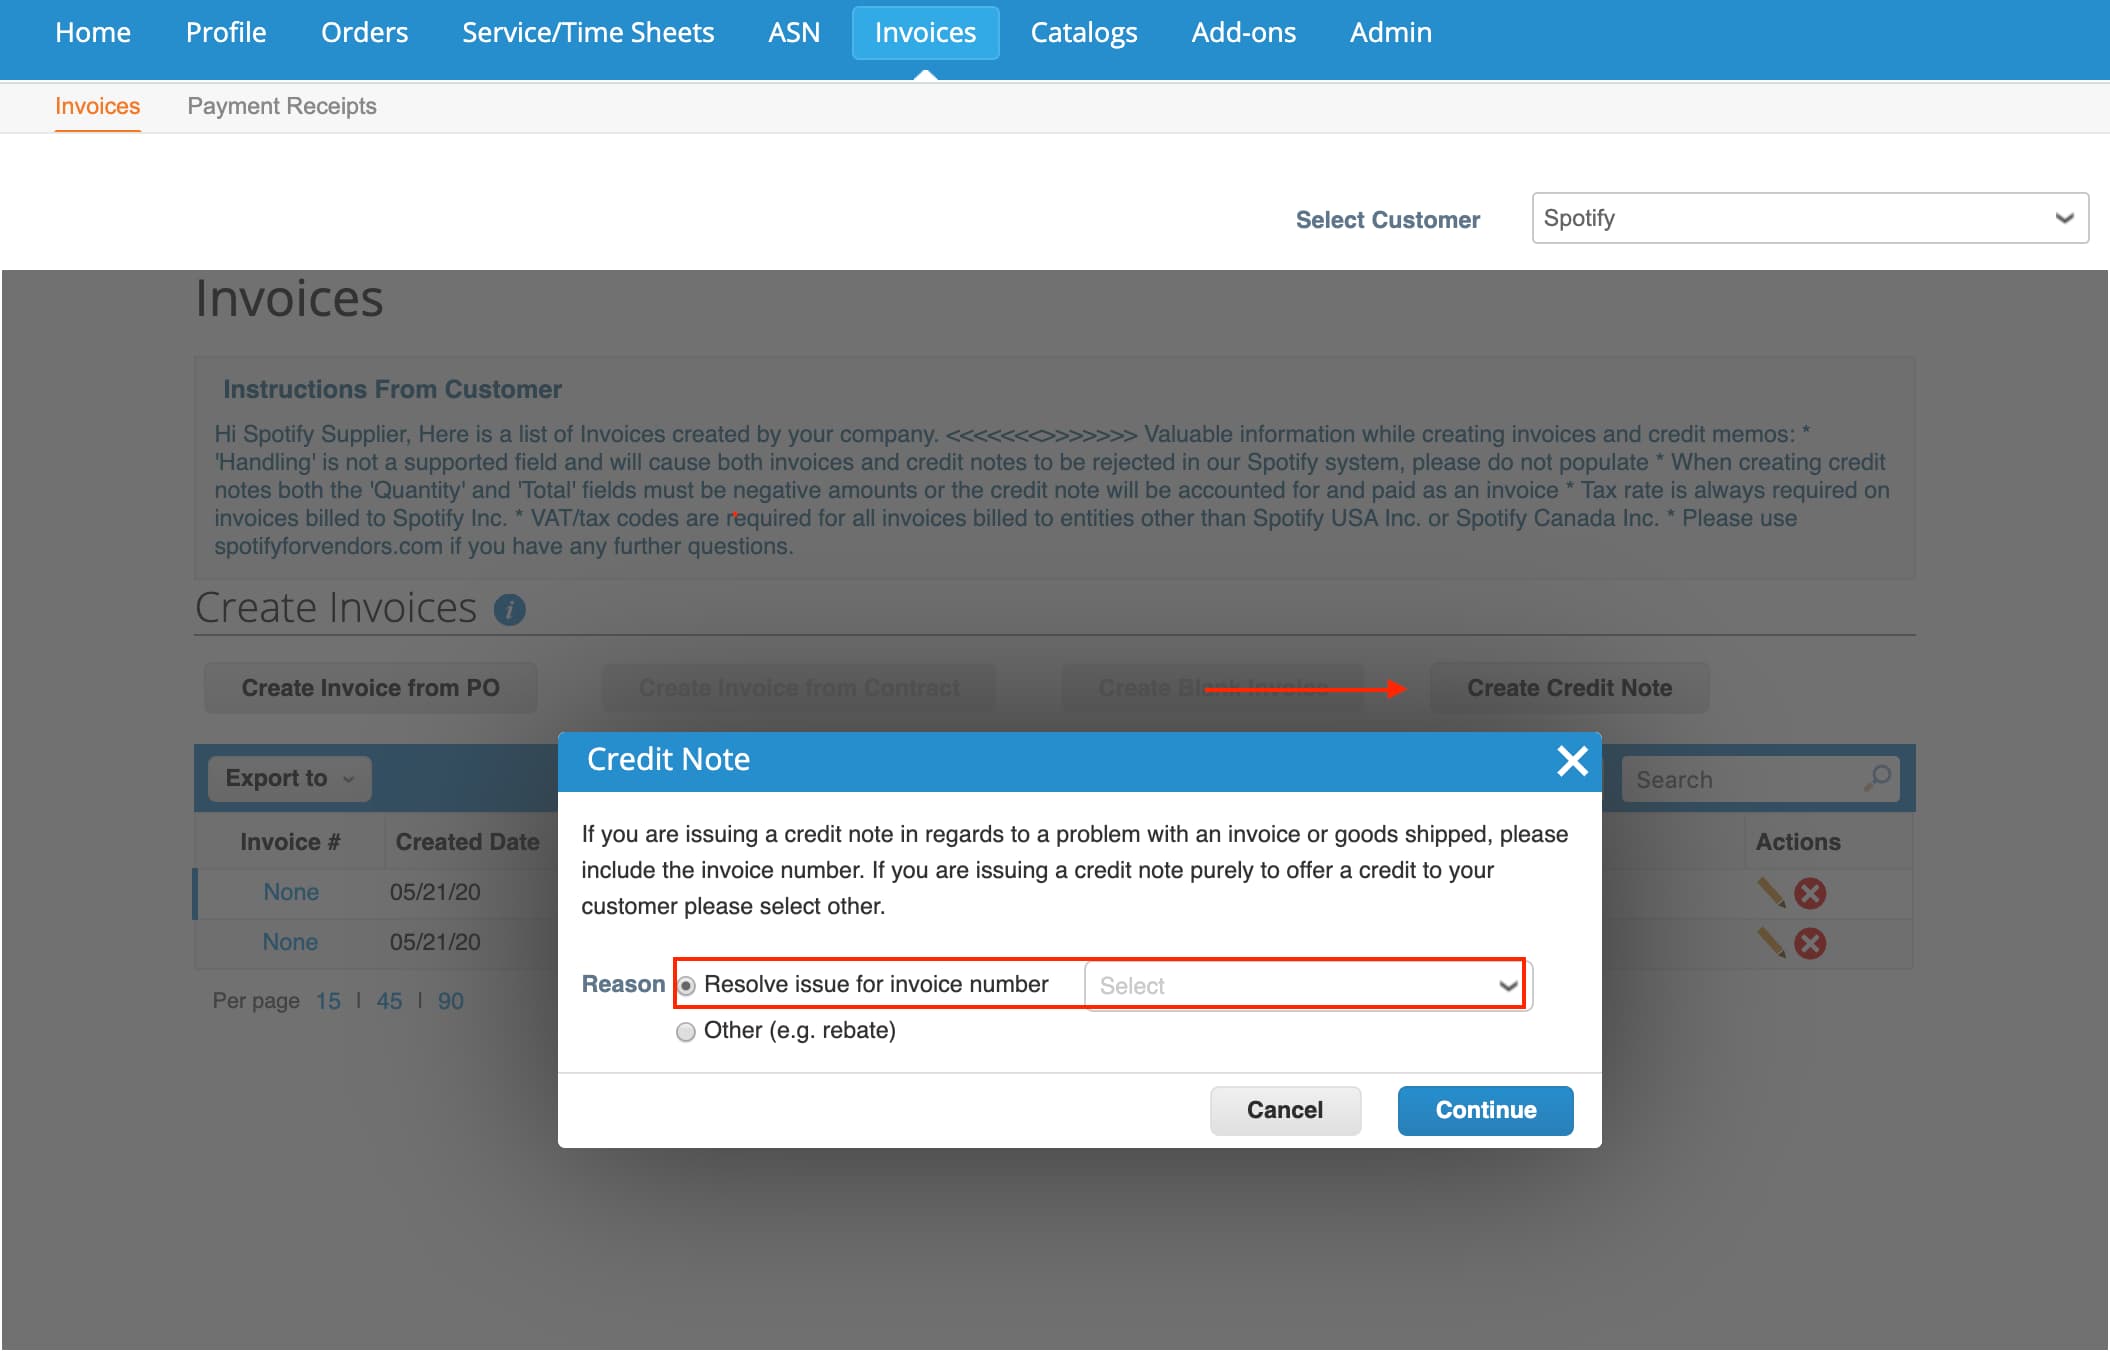
Go to the Invoices Tab then scroll to the Create Invoices Section. There will be 4 buttons, click on “Create Credit Note”.
Click that button and a screen will appear giving option to “Resolve issue for invoice number” with a dropdown of all applicable invoices.
Once you have selected the invoice to apply the credit note, you will need to select if the credit memo is for the the full amount or partial amount of the invoice.
Coupa will redirect you to the Credit Notes page where you will need to enter the Credit Note number (Spotify’s normal procedure is the invoice number #####_CN). If you have a PDF credit note, please attach it to the credit note.
Click submit, confirm the information, then click Send.